Background Payment Posting
In LS Express, background payment posting automates the processing and posting of sales payments without requiring manual intervention. This feature allows the system to handle payment posting in the background, allowing users to continue with other tasks.
How to: Enable Background Payment Posting
How to: Enable Background Payment Posting
-
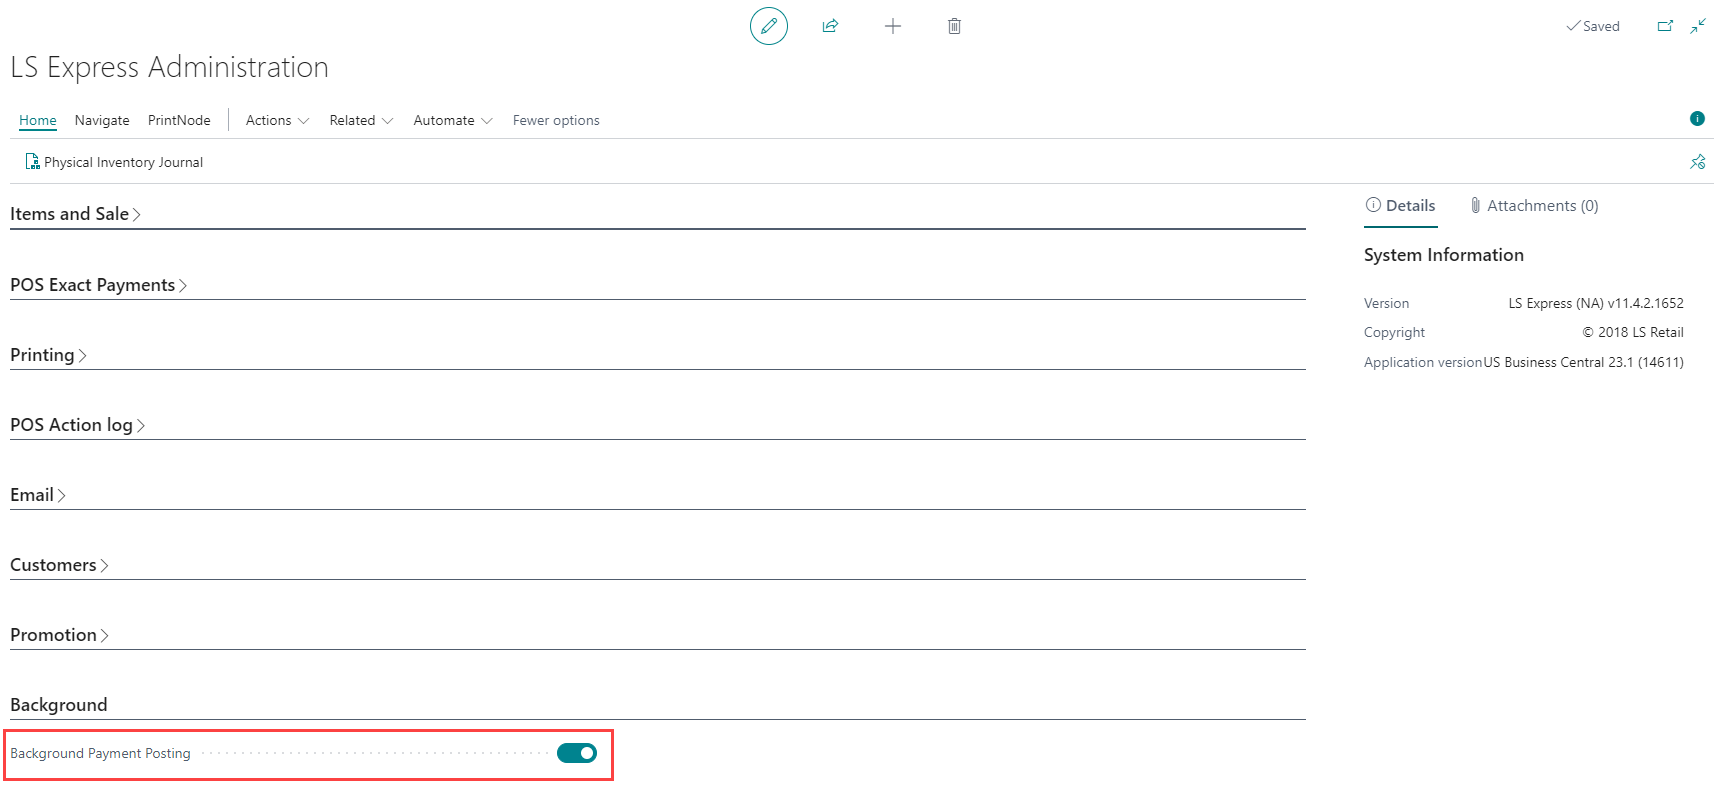
Open the LS Express Administration page.
-
Go to the Background FastTab.
-
Enable the Background Payment Posting toggle to activate background payment posting.
Job Queue Entries
To manage job queue entries for background payment posting, follow these steps:
-
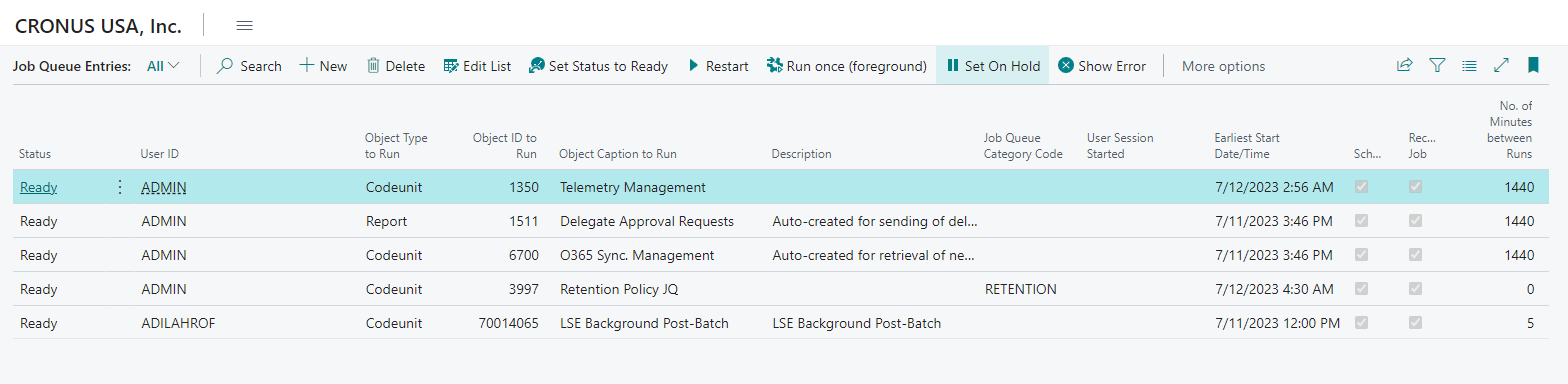
Search for Job Queue Entries and select the relevant link.
-
Create a new Job Queue Entry and fill in the necessary fields.
-
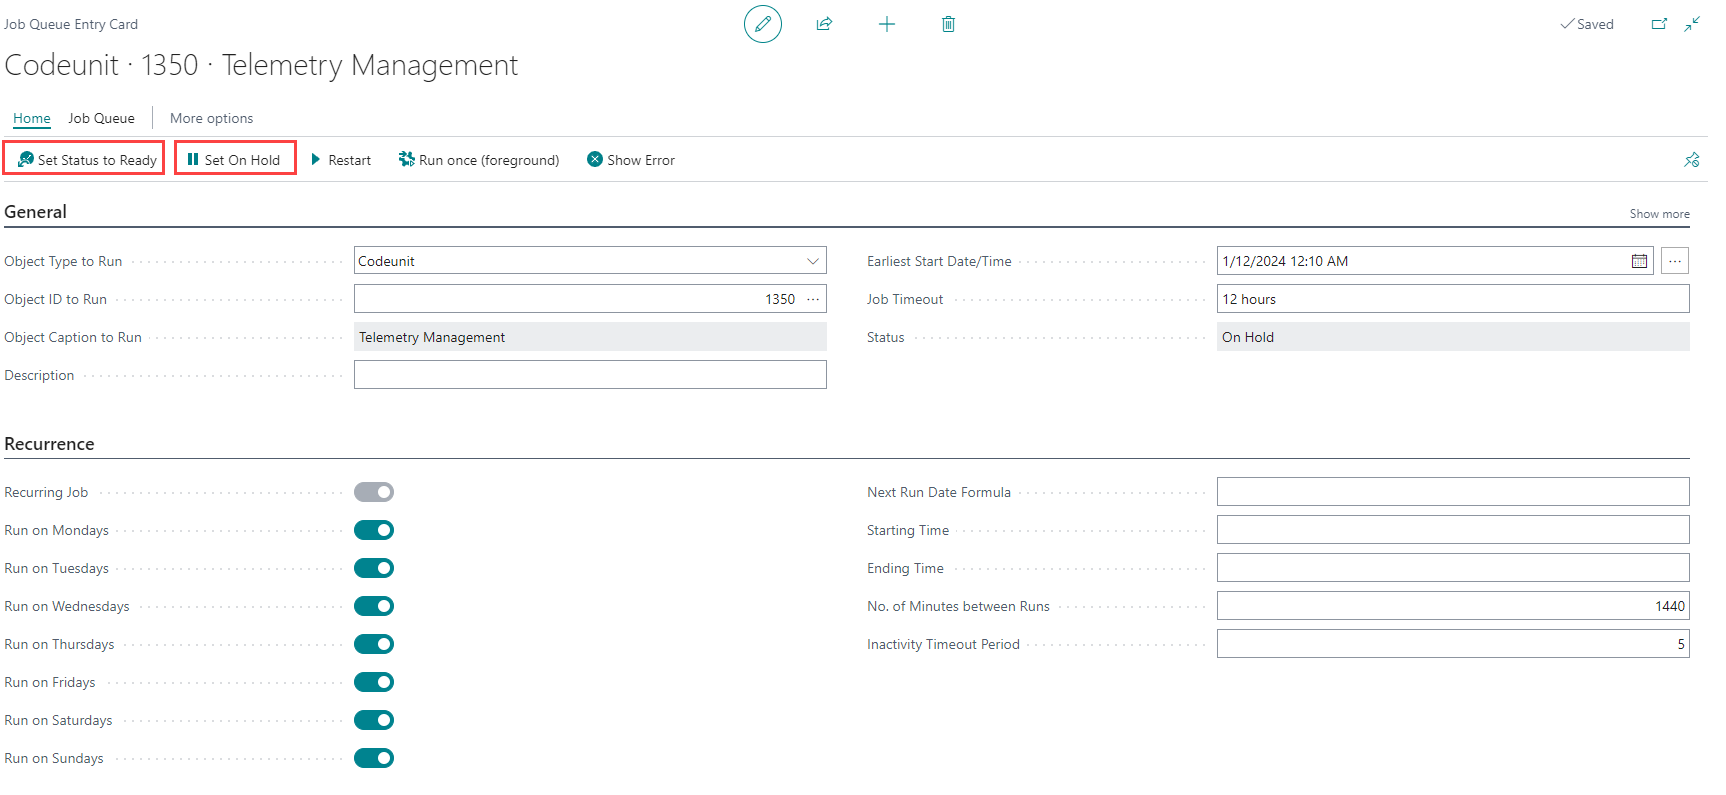
On the General FastTab:
-
Specify the type of the object (Report or Codeunit) that is to be run for the job queue entry.
-
If you select Codeunit, then specify the ID of the codeunit that should be run. Enter 70014065 in the Object ID to Run field.
-
Provide a description of the job queue entry.
-
Specify the earliest date and time when the job queue entry should be run.
-
Set the maximum time that the job queue entry is allowed to run.
-
The status of the job queue entry is initially set to On Hold. You can set the status to Ready and back to On Hold. Otherwise, status information in this field is updated automatically.
-
-
On the Recurrence FastTab:
-
Specify if the job queue entry is recurring by enabling the Recurring Job toggle.
-
If the entry is recurring, specify the days of the week it should run, the time of day, and the interval between runs.
-
POS Sales Staging
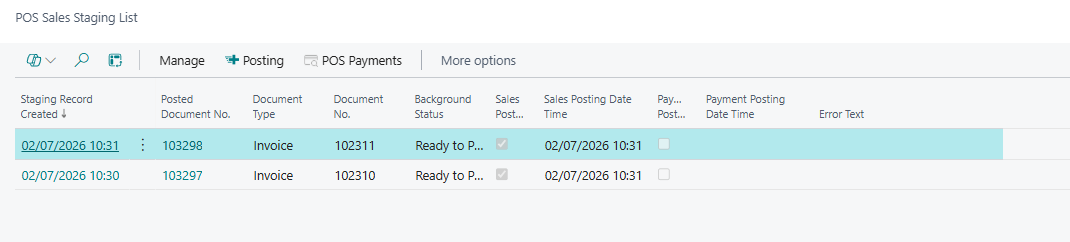
Every POS transaction that goes through background payment posting creates a record in the POS Sales Staging table. The staging pages let you monitor the posting status of all transactions and manually retry any that failed.
POS Sales Staging List
To open the list, go to the Administration page and select Navigate > POS Sales Staging.
The list is sorted by Staging Record Created in descending order so the most recent transactions appear at the top. The following columns are shown:
| Field | Description |
|---|---|
| Staging Record Created | Specifies the date and time when the staging record was created. This timestamp is taken from the posted sales document. |
| Posted Document No. | Specifies the number of the posted sales invoice or credit memo. Click this field to open the posted document directly. |
| Document Type | Specifies the type of the original sales document: Invoice or Credit Memo. |
| Document No. | Specifies the number of the original (unposted) sales document. |
| Background Status | Specifies the current posting status of the record. See Background status values for a description of each value. |
| Sales Posted | Specifies whether the sales part of the transaction has been posted. |
| Sales Posting Date Time | Specifies the date and time when the sales posting completed. |
| Payment Posted | Specifies whether the payment has been posted. When this is checked and Background Status is Completed, the transaction is fully processed. |
| Payment Posting Date Time | Specifies the date and time when the payment posting completed. |
| Error Text | Specifies the error message recorded when posting failed. This field is populated when Background Status is Error, and is cleared after a successful retry. |
POS Sales Staging Card
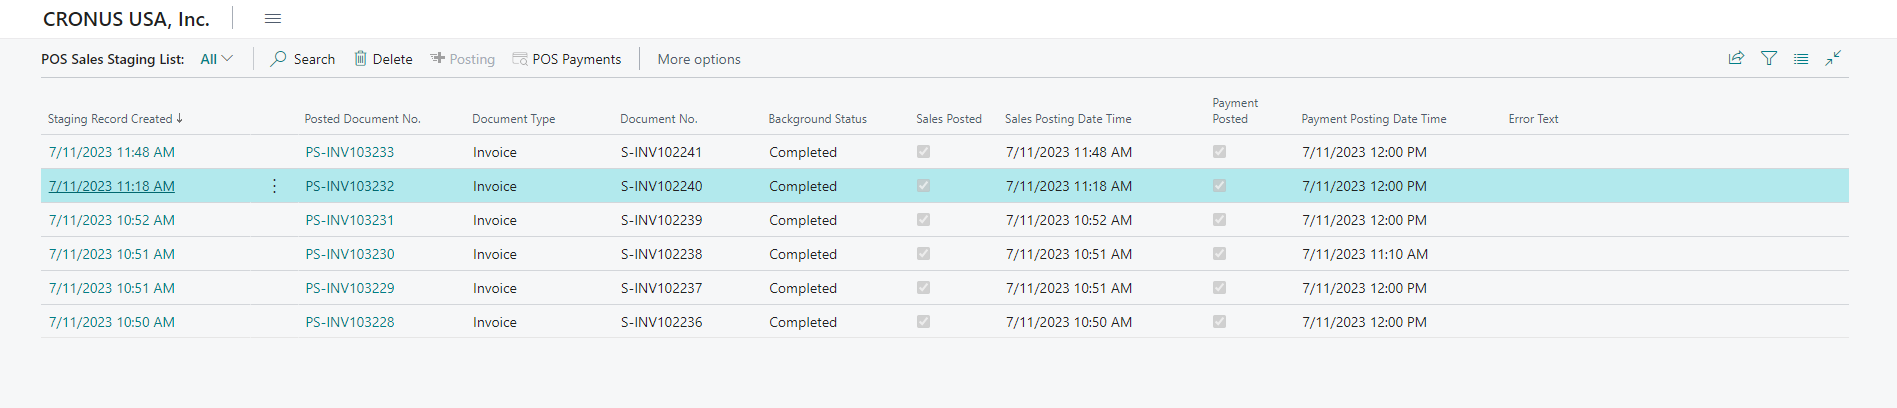
Select a record in the list and open it to see the full detail card. The card is read-only. Fields are organized across three sections.
General section
| Field | Description |
|---|---|
| Posted Document No. | Specifies the number of the posted sales invoice or credit memo. Click this field to open the posted document directly. |
| Document Type | Specifies the type of the original sales document: Invoice or Credit Memo. |
| Document No. | Specifies the number of the original (unposted) sales document. |
| Staging Record Created | Specifies the date and time when the staging record was created. |
| Store ID | Specifies the store where the POS transaction originated. |
| POS ID | Specifies the POS terminal number where the transaction was processed. |
| Drawer ID | Specifies the drawer that was used for the transaction. |
| Staff ID | Specifies the staff member who processed the transaction. |
Sales section
| Field | Description |
|---|---|
| Amount Excluding Tax | Specifies the net sale amount, excluding tax, from the posted document. |
| Amount Including Tax | Specifies the gross sale amount, including tax, from the posted document. |
| Tax Amount | Specifies the tax portion of the sale (Amount Including Tax minus Amount Excluding Tax). |
| Currency Code | Specifies the currency used for the transaction. |
Status section
| Field | Description |
|---|---|
| Background Status | Specifies the current posting status. See Background status values. |
| Sales Posted | Specifies whether the sales part of the transaction has been posted. |
| Sales Posting Date Time | Specifies the date and time when the sales posting completed. |
| Payment Posted | Specifies whether the payment has been posted. |
| Payment Posting Date Time | Specifies the date and time when the payment posting completed. |
| Error Text | Specifies the error code and message recorded when posting failed. This field is cleared automatically after a successful retry. |
Background status values
The Background Status field tracks the posting lifecycle of each staging record.
| Status | Description |
|---|---|
| New | The staging record has been created but posting has not yet been attempted. |
| Ready to Post | The sales transaction is ready for background payment posting. The job queue or the manual Posting action will pick up records in this status. |
| Completed | The payment has been posted successfully. The Payment Posted field is checked and the Payment Posting Date Time is recorded. |
| Error | Posting failed. The Error Text field contains the error code and message. Records in this status can be retried using the Posting action. |
| Cancel | The staging record has been cancelled and will not be processed. |
Handle failed postings
When background posting fails, the Background Status changes to Error and the Error Text field records the error code and message. To investigate and retry failed records:
-
Open the POS Sales Staging list. Records with Background Status = Error need attention.
-
Select one or more records in the list.
-
Review the Error Text column (or open the card to see the full message) to understand why posting failed.
-
Resolve the underlying cause — for example, verify that the payment method is correctly set up or that the customer account has sufficient data.
-
Click the Posting action to retry. The action processes all selected records whose Background Status is Ready to Post or Error.

-
After a successful retry, Background Status changes to Completed, Payment Posted is checked, and Error Text is cleared.

Note: The Posting action is only enabled when the selected record has Background Status = Ready to Post or Error. Records with status Completed or Cancel cannot be re-posted from this page.
View POS payment details
If a record's payment has not yet been posted, you can view the associated POS payment lines directly from the staging card or list using the POS Payments action. This opens the payment history for the transaction and can help you identify data issues before retrying posting.
Note: The POS Payments action is only available for records where Payment Posted is not yet checked.
Automatic posting via job queue
If the job queue entry is set to Ready within the configured interval, all staging records with Background Status = Ready to Post or Error are processed automatically. See Job Queue Entries for setup instructions.
Close Out Summary
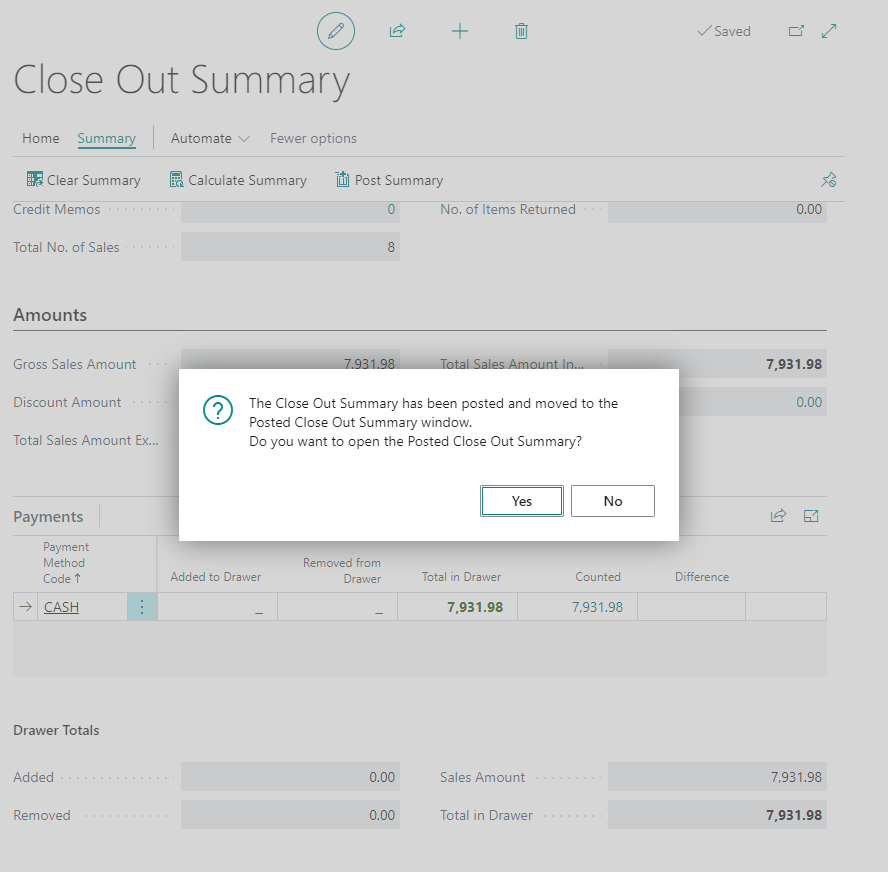
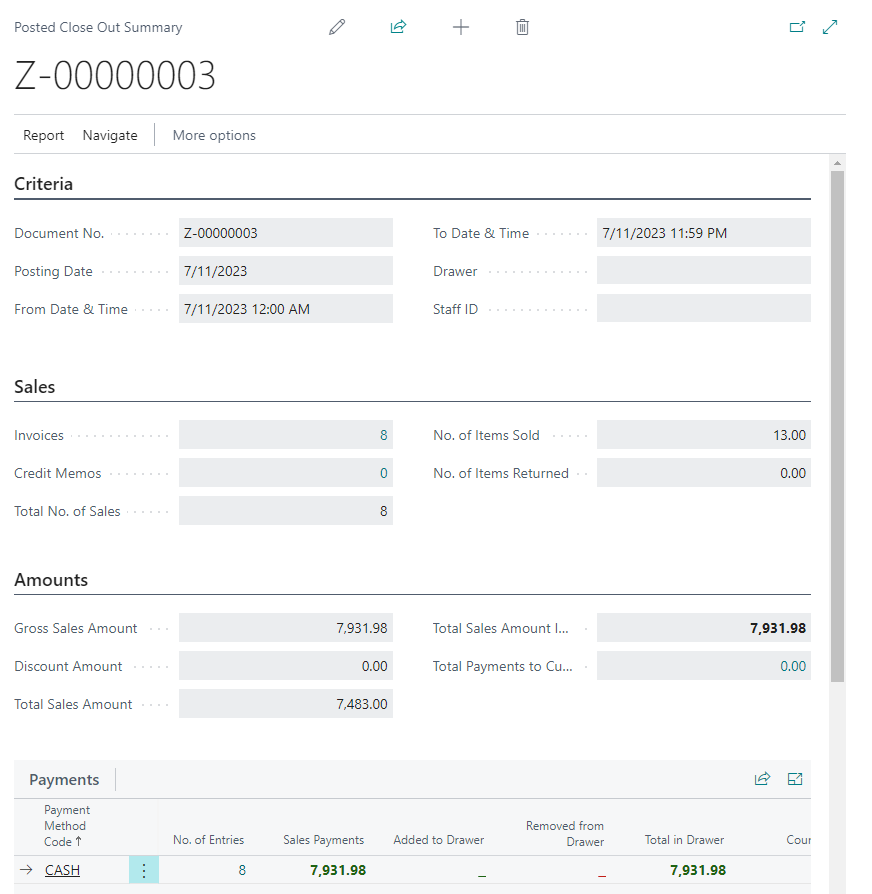
If there are any pending payments in the background payment posting, you should not be allowed to post the store summary for the time period.
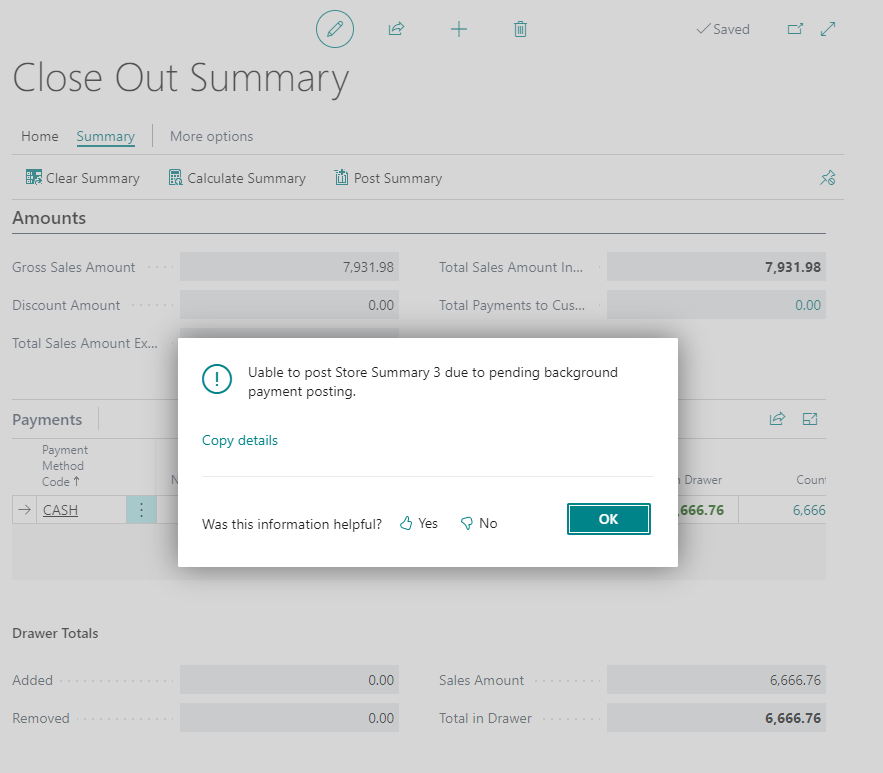
To post the store summary at the end of the day, ensure that all payments have been successfully posted in the POS Sales Staging.